Showing posts with label Public Service. Show all posts

Wednesday, March 9, 2022

Emergency preparedness Series (Go-Bottle)


"The prudent see danger and take refuge, but the simple keep going and pay the penalty".

~Proverbs 27:12 NIV 


             Since I first got into ham radio, Skywarn, and ARES (Amateur Radio Emergency Services) one topic has always come up on one end of the spectrum or the other and that is the Go-Bag and emergency preparedness. Whether  you are a railfan heading out on a local trip or a 5 hour cross state drive, a ham radio operator that is a storm spotter or that does disaster response or just a average everyday person who works, you need a Go-Bag.. Why do you need one? The answers simple, to sustain yourself for the day,  until help arrives or you can make it back home to safety. In the next article I will cover my EDC (Everyday Carry Bag) But in this article I want to cover a simple solution I found that can be put together for less than $200 bucks, can go anywhere you go whether it be work, a day railfanning, field day, or a trip out to the park. 


    Many years ago I just went out railfanning and didn't give much thought to what to eat drink or even if something happened how would I get home. To put it lightly I was young and dumb, sometimes I would pay attention to the weather and with the abundance of restaurants and vending machine around I was pretty set for a day of watching trains. Fast forward 20 something years and the food scene and area has changed drastically  along with my  daily needs and budget. For the most part I don't like lugging around my Go-Bag everywhere I go and some places are not bag friendly. I needed something that I could break away from my bag and if needed keep a low profile with  should the need for me to get home arise and I have to face possible dangerous encounters on my way home. This setup below also allows me a quick throw in the car and  go solution to my everyday carry bag for places close to home. 

The Go-Bottle 


                Let me introduce you to the Battle Bottle from Iron Infidel it is a 2 liter stainless steel bottle that comes with a neat camo carrier or if your savvy like me you buy the 2 cover version to switch up. Pictured above is it in the black camo pattern. As a ham radio operator most events I have done are marathons and if you have done any then you know that they only last a few hours, way too little to use your 72 hour bag. The bottle above filled with the water and gear weighs about 10 pounds, fits in between the seats of your car and provides you with a few hours of  operating without breaking out your 72 hour go bag.  Let's unload our bottle and  see what has worked well for me. 

The Contents 


        From top left here are the contents: 


1. Compass map reader* 

2. Water key  (to refill the bottle) 

3. Sharpie Marker 

4. Snack 

5. Snap lights (Green)* 

6. Flashlight (Mini Goose Neck)  

7. Ferro Rod 

8. Knife 

9.  Magnifying glass 

10. Bottle with cover 

* ( comes in a multi pack that will be broke into Additional  Go- Kits) 

For the most part I have everything I need should  any emergency arise or if I decide I don't want to drive I have a quick solution that I can just through into a car and go without tasking the driver with a bulky bag or taking up precious room in their car. Almost all of this stuff can be found on amazon but I have included a link to the battle bottle. How you put it together is for you to decide, I just wanted to show you what has worked well for me. If you have any questions just write in the comments below and I will cover them in another blog post. 


Link to the bottle: (and no I am not affiliated with them just a really happy customer) 

This is for the 2 cover 1 bottle set. https://ironinfidel.com/collections/battle-bottles/products/battle-bottle-ocp-and-ocp-black


Friday, December 17, 2021

Storm Spotter, an inside look Part1


Freedom is not constituted of privileges but of responsibilities 

~Albert Camus 


          Good Afternoon friends, today I want to start off a three to four part series on being a storm spotter and what it takes to be one beyond just the Skywarn training. In this blog we are going to cover the mobile end of it and some of the special set-ups and modification's made to my vehicle in order to do it safely and efficiently. Let's take a look at what has worked well for me and some of the equipment I use. 


            For the most part I drive a 2006 Dodge Grand Caravan and I decided not to post any exterior pics just because of the aesthetics  of the car would not let me show it in a good light, so we will focus on the inside equipment for the most part. Now if you are fairly new to storm spotting or are looking into it I hope this advice helps. You don't want to buy a new car or to go chasing in a 50K Dodge ram pickup truck right off the bat. The reason is, things happen, the reason I say this is you can easily turn that nice truck into a 2 ton tuna can in a hurry so start off with a older less expensive option like I did. 


Passenger side 
      

      In the picture above you are looking at the passenger side of the vehicle and where my partner sets while we are operating. This is the radar/ spotter seat this allows me or the driver to focus on the road condition ahead and affords the team the ability to keep out of the path of the storm. From this perspective you can see the laptop mount, laptop for radar positioning via cell and satellite, fire extinguisher and the weather tech mats. Out of sight in this view is the cell/ satellite booster used to keep the mobile data coming in. 


Drivers Side 

           Looking in from the drivers side we see the amateur radio used to call in reports, the handheld radio mount for the DMR (digital Radio) and the scanner used for Weather/CB Monitoring. One of the things I lack is a CB radio but that is on the list to be put in. By having the laptop mount in place allows for us (me and my partner) to keep eyes out the window while making sure we are in a safe location. Mobile spotting has it's dangers and if we are going out in the city I usually don't drive through traffic instead we find a spot and sit to watch the storm from a  safe distance. 


The back hatch 

        Moving to the Rear of the vehicle here we see more additional equipment. In my blog the incident command I explained how I built this for my vehicle and for short the short explanation it enables me to help establish emergency communications if need be, The orange case is more radio gear and the drawer contain usually a anometer for wind speed and other needed items. Other items that go behind the box are listed below.


  72 hour go-bag with IFAK med kit:  Out storm spotting this is a must especially if you come upon a town damaged by a tornado. It enables you to help out and save lives after the storm passes without the need to become a victim yourself and enables you to be self sufficent


CERT Bag: Some communities such as Copley (an adjacent town) have a Community Emergency Response Team and this allows us to function in a roll other than just another storm spotter trying to help. (I would suggest highly into getting into one it is a lot of fun) 


 Food and Supply crates:  This allows us to maintain extended operations as we may not be able to leave the damaged town for a few days, This contains non-perishable easy to cook food, gear and supplies  and the other containers contain teddy bears to comfort scared or hurt children. 


 EDC Bag and Lunch Boxes:  These usually sit up between the  rear passenger seats and provide food and other personal to our team members as we can be out on the road for a while on a very active day. 


Tools And other items: I carry a gas chainsaw (to remove downed trees)  and a few cans of fuel along with tools for the repair of the car and other spare parts to make needed field repairs . 


 Camera bag and media gear:  This should be self explanatory but it enables us to document and live stream video of the storm   


        For the most part we spot in teams of 2-4 people and those consist of  myself, my love, and whichever Skywarn trained friends want to ride along I hope you enjoyed my short blog and tour of my storm spotting vehicle. In the next blog we will cover the basics of information gathering, why I became a spotter and how we know when to load up the van. If you liked the blog click subscribe, leave a comment, if you have a suggestion for the vehicle let me know too. Remember God is still in control and let's keep those affected by the tornadoes in your thoughts and prayers. Until next time my friends 73 


Monday, December 28, 2020

The Go-Box Chronicles (The Incident Command)


“All mankind is divided into three classes: those that are immovable, those that are movable, and those that move.” -Benjamin Franklin


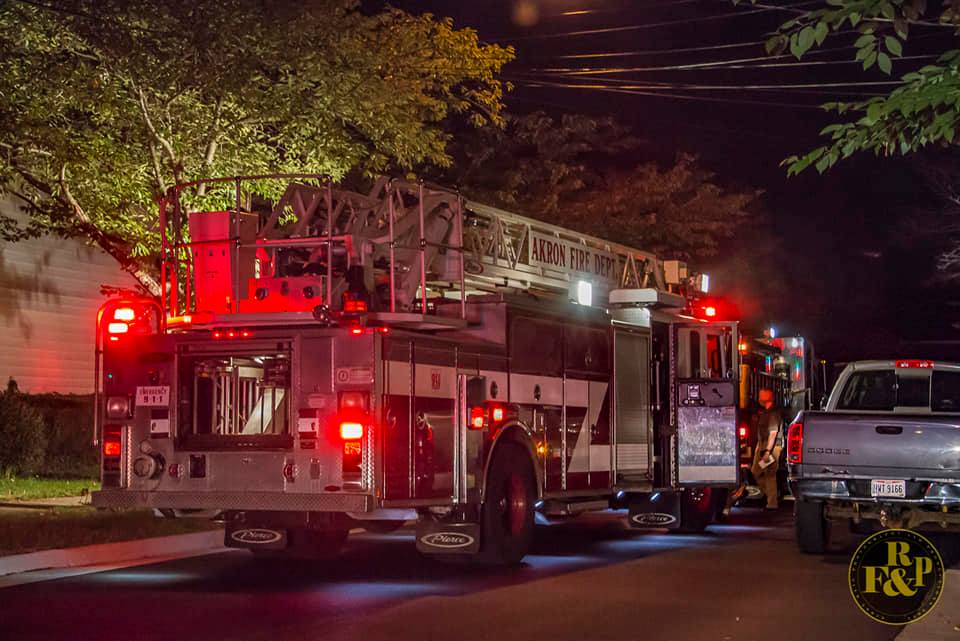
   Recently I was over by a friend of our families house and the apartment up the street had a kitchen fire.  I was milling around  the scene taking pictures  of the firetrucks and the scene when I noticed the back of the battalion chiefs SUV had a mobile incident command center.  The center was small enough to fit into the back of the SUV and contained a small desk, a base type radio along with other stationary items needed to provide a safe command station to the responding fire companies. Unfortunately I was unable to get close to get pictures as it was a very busy scene.

A box similar to Akron's (Image from the internet for reference) 

To say I was intrigued would be an understatement, not only did it have the radios but also storage areas, and a marker board  with a integrated desk. The idea for one when I go trackside, or when I do a public service events came to mind, however I just couldn't find something that  I liked and that would work with my new go box so I decided to set out on my own and build it myself. 

I had a general idea of what I wanted but there were several features that I felt could be incorporated into my design and some items that could be eliminated. One of the things that was not needed was all of that storage,  so I narrowed it down to a single deep divided drawer and a tuck under shelf for my clip boards and other paper work.  This allowed me to make the one half of the unit to fit my Go-Box in which from my previous blog allows it to be modular to be taken from the shack to the car quickly and efficiently. So lets take a tour of my Ham Command Center. 
A perfect fit  
   

     The dimensions are 15" Deep by 48" Wide by 15" high at the radio bay and is a custom fit for my go box. From left to right there is a nook to store my headphones and any other small cases between the wheel well and tailgate area. Next is the Go-Box bay, it is open in the back to allow venting and power cable routing along with a battery tray to make the whole setup independent of the vehicles power system. Next is the desk and drawer that keeps small items such as charts, papers, forms, spare antennas, HT's, and other miscellaneous items needed at bay. Finally on the top of the drawer is the small desk for writing, it is angled about 5 degrees and has a strip across the bottom to keep items from sliding off. 

    I feel I accomplished what I wanted, and once I get a chance later this coming year to  fully test my setup and see how it operates I will either be tweaking things or will be going full ham (Pun intended). This concludes part 2 of my Go-Box chronicles and hopefully I have inspired you to build something for your vehicle. Until Next time my friends, take care, be blessed and remember God is still in control. ~73 


If you enjoyed Please Click Subscribe,
Follow the Radioactive Railfan on Facebook: https://www.facebook.com/radioactiverailfan


Radio Time

  "Amateur  radio knows no boundaries except those set by the frequency" ~Unknown                     This morning I woke up to th...